
If you have a travel trailer, then you know that it’s not hard to get into a rhythm of taking care of your rig. However, if you’re planning on using your travel trailer for some time, then you should take the time to do some routine maintenance every few months or so. This will help keep it running smoothly and will make sure that everything is in good shape if something does break down. Here are some tips for DIY travel trailer maintenance:
Check the water lines for leaks.
If you have a travel trailer, check all of the water lines for leaks. This is usually the most common cause of leaks and can be done easily by simply checking around the hull and under your trailer. If you have been in mud or water recently, look for any leaks under the camper as well.
Make sure the battery is fully charged and that the terminals are clean.
After you’ve done all the heavy lifting, it’s time to get in there and do some maintenance. First, make sure that your battery is fully charged. If you have a solar panel on top of your trailer, this should be pretty simple. When you park for the night, plug in an extension cord from your trailer to a nearby outlet or light socket outside (or just use a 12v adapter). This will allow for continuous charging throughout the night and ensure that your battery stays fully charged during storage periods when it’s not in use.
The next thing to check is whether or not your terminals are clean and corrosion-free before connecting them to their respective components like lights or appliances inside of your travel trailer. You can either clean them with steel wool or sand paper (which will leave behind metal shavings) or dip them in baking soda/water mixture overnight before rinsing off with water afterwards—just make sure they’re completely dry before attaching again!
Empty holding tanks and check for leaks.
The first step in maintenance is to empty your holding tanks at least every 5-7 days. This may seem like a lot, but it’s important to do so because the tanks will get backed up if they’re not emptied regularly.
If you don’t have a sewer hose and are using a bucket, dump out both tanks at once. Place an old towel on the ground where you’ll be dumping them, and then put one hand over each tank opening (this will prevent smell from escaping). Dump each tank into the towel until all of its contents are gone.
Check for leaks after emptying all tanks by spraying water around connections and seams, especially near any valves or other moving parts that could create a leak. Fix any leaks immediately; if left untreated for too long they can cause damage to your RV!
Check tire pressure and tread.
Check tire pressure monthly. Tire pressure should be checked monthly, especially if you’re traveling long distances or in hot climates where tires can heat up faster. You may need to add more air to keep your trailer level and handle safely.
Check tread every time you check the pressure, because tread can wear down as much as 1/16 inch (1.5 mm) per 1,000 miles (1,600 km). The maximum safe tread depth is 2/32″ (1 mm), which will help prevent hydroplaning and loss of control on wet roads. If it’s time for new tires, choose a higher-quality all-season tire that has a load index at least equal to the one on your current set of wheels, plus an additional mph designation depending on how fast you drive most often—it’ll last longer and provide better traction while steering through turns or braking in wet conditions
Inspect all hoses, belts and fluids.
- Inspect all hoses, belts and fluids. Hoses should be replaced every 2 years, and belts every 3-5 years. Fluid levels should be checked and topped off at 5 year intervals.
Test all appliances.
Test all appliances. Make sure that your refrigerator, oven, sink and shower work well. Test the power cords to make sure they are not frayed or damaged. Test each electrical outlet to make sure it works properly and does not get hot when plugged into the wall. Do a quick check of the gas grill before you attempt to use it for the first time!
Test electrical outlets and functions.
One of the most important things to do when you’re preparing a travel trailer for its first big trip is to test all the electrical outlets and fixtures. You don’t want any surprises midway through your vacation, so it’s best to check those things now.
First of all, make sure that each outlet works—meaning that when you plug something into it, it turns on. If an outlet does not power on with no other appliances plugged in (like lights), then you should replace the outlet.
Next, make sure that none of your switches are loose or corroded and check them over for damage or fraying exposed wiring. If anything looks suspicious, get out your multi-meter and check everything again before using them!
Inspect the roof and seams for holes and cracks, replace caulking as needed.
Inspect the roof and seams for holes and cracks, replace caulking as needed.
Check seams for damage. Check for leaks in the roof. Look for damage on the roof, ceiling or walls
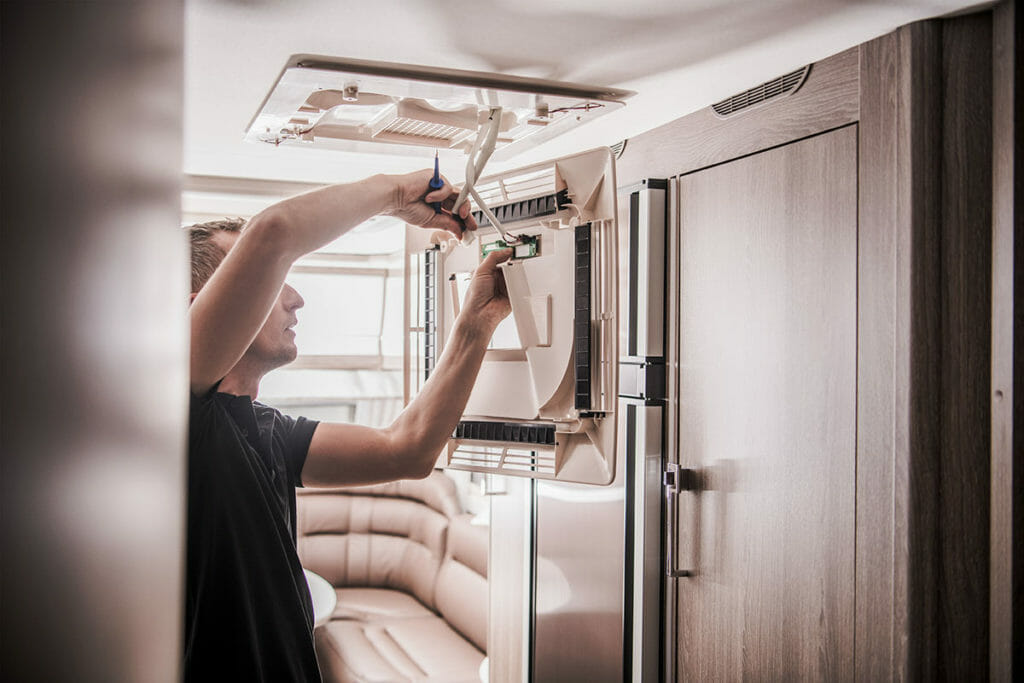
Clean air conditioner filters.
- The air conditioner filter should be cleaned according to your manufacturer’s recommendation. If you can’t find the information, you should clean it every two weeks or so.
- If you don’t clean the air conditioner filter, there is a risk of dirt buildup and mold or mildew growth inside the unit. This will cause an unpleasant smell in your travel trailer, which can make it difficult to use.
- Make sure that any replacement filters you buy are approved by your travel trailer’s model number, as some brands won’t fit properly and could cause damage when used with certain types of equipment (such as split style heaters).
Clean out the refrigerator, defrost freezer if needed.
The refrigerator should be cleaned out and the interior of the unit should be wiped down with a mild soap and water solution. A sponge or soft rag is best, as anything rougher can damage the finish on your refrigerator.
The exterior of your travel trailer’s refrigerator will also benefit from a thorough cleaning, especially if you’ve been in an area with a lot of people who thought it would be hilarious to spit on your charming vintage camper. Use a sponge or soft cloth dipped in warm water with mild detergent (or just hand soap) and wipe down all surfaces and edges to remove dirt, grime, scuffs, etc.. Once everything has been thoroughly cleaned off (and dried), use plastic polish to restore shine if necessary.
You’ll also want to inspect underneath where condenser coils are located on top of back wall behind ice maker area — these can collect mold over time so make sure these are clean as well!
You can get many years of use from your travel trailer if you take care to maintain it properly
- Look for leaks. Check the floor, ceiling and around the edges of your travel trailer; look for moisture in any of these areas. If there’s a leak, you’ll want to fix it as soon as possible—not only does it damage your trailer, but mold can grow in these places too.
- Check battery charge level regularly by using a voltmeter or multimeter (both tools are available at hardware stores).
- Have your tires checked by a professional every six months or so if they’re inflatable tires (like those on traditional RVs), or every year if they’re solid rubber tires like those found on most travel trailers and fifth wheels. Your local tire store will be able to let you know whether or not it’s time for new ones when they do this inspection!
- “Tread” refers to how deep into the rubber treads on tires go; this can help determine how much longer those tires will last before needing replacement–so take care not only about checking tread depth but also about maintaining proper pressure levels within each tire regularly throughout extended periods without driving (like winter months when snow covers roads)! It’s also important because low pressure means less traction while driving on paved surfaces like highways–which could lead into dangerous situations while driving near other cars who may have no idea just how slippery their ground might be beneath them right now!
Conclusion
With the right maintenance, your travel trailer will last for years and years. If you take care to do all of these things on a regular basis, you can be sure that your trailer will last as long as possible.