

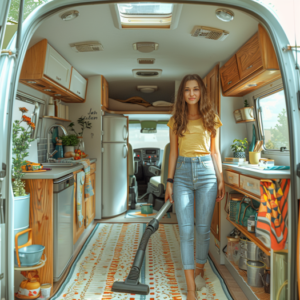
Kick off your 2024 RV spring cleaning by decluttering; toss out what you didn’t use last season. Start cleaning from the ceiling down to avoid redoing work. Dust, vacuum, and steam clean to get your interior spotless. In the kitchen and bath, sanitize every surface. Don’t forget a deep exterior wash and apply wax for protection. Check all appliances and systems, ensuring everything’s in top shape. Address any mold or pest signs early. Lastly, enhance air quality by replacing filters and ventilating well. Follow these steps, and you’ll uncover even more ways to keep your RV in prime condition.
Decluttering Your Space
Before getting into the nitty-gritty of spring cleaning your RV, it’s essential to start by decluttering your space, which will transform your vehicle into a more organized and enjoyable living area. As you venture on this journey, remember that decluttering isn’t just about removing items; it’s about creating a more spacious and functional environment that aligns with the freedom your RV promises.
Start by sorting through your belongings, separating out those you haven’t used in the last travel season. Chances are, if you haven’t needed it by now, it’s not essential. By removing these unnecessary items, you’re not only making your upcoming cleaning tasks easier and more efficient, but you’re also reevaluating what’s truly important for your adventures.
Next, focus on organizing what remains. This step is vital for improving functionality and accessibility in your RV. Consider using organizers or storage solutions that maximize space without adding clutter. An organized RV is more than just tidy; it’s a reflection of a stress-free lifestyle on the road. By simplifying your space, you’re setting the stage for a cleaner, more enjoyable travel experience.
Top-Down Cleaning Approach
After decluttering your space, it’s time to tackle cleaning with a top-down approach. Starting at the ceiling and working your way down guarantees that you won’t have to re-clean surfaces due to falling dust and dirt. This method not only saves you time but also ensures a more thorough and efficient clean of your RV’s interior and exterior.
Benefits of Top-Down
Implementing a top-down cleaning strategy in your RV guarantees you won’t waste time redoing areas due to dust and dirt trickling down to surfaces you’ve already cleaned. When you start on your spring clean, this method is your ticket to a deep clean that’s both efficient and thorough. Beginning from the top makes sure that all the dust and debris naturally fall downward, allowing you to capture and remove them in one smooth operation. It’s one of those RV spring cleaning tips that seasoned travelers swear by. Not only does it save you time, but it also guarantees every nook and cranny gets the attention it deserves. Adopting a top-down approach is a smart move for anyone looking to hit the road with a spotless and inviting RV.
Practical Cleaning Tips
To maximize efficiency during your RV’s spring clean, start at the very top, making sure dust and debris naturally work their way down as you progress. Dedicate time to inspect and clean the nooks where mold thrives, especially around window frames and door seals. In the kitchen, tackle overhead cabinets first, then appliances, and countertops last, preventing any overlooked dust from settling on cleaned surfaces. Steam cleaning is your best ally for sanitizing upholstery and carpets without harsh chemicals, preserving the freedom of a healthy living space. Don’t neglect the door seals and slide-outs; these areas are prone to collecting dust and moisture, leading to potential issues down the line. With these steps, you’ll make certain every corner of your RV is ready for adventures ahead.
Interior Deep Clean
Starting an interior deep clean of your RV requires first clearing out personal belongings, edibles, and appliances to uncover any lurking maintenance issues. This initial step paves the way for a thorough cleaning, ensuring you’re not just skimming the surface but really getting down to the nitty-gritty. Vacuuming every corner, crevice, and cushion is your next move. It’s astonishing what builds up over miles and seasons. This isn’t just about aesthetics; it’s about creating a space that breathes freedom, without the sneeze-inducing dust or the unwelcome critters that hitched a ride.
Now, bring in the heavy artillery: steam cleaning. It’s like giving your RV’s interior a spa day. Carpets and upholstery will not only look revived but smell fresh, offering a clean slate for your adventures ahead. Don’t skimp on sanitizing, especially in the kitchen and bathroom areas. This step is vital to fend off mold and maintain a pristine environment.
Speaking of mold, a meticulous inspection during your clean sweep is non-negotiable. Catching these spores early guarantees your RV remains a healthy haven on wheels. Remember, it’s not just about the journey or the destination; it’s about enjoying a space that’s truly yours, free from the clutter and chaos of the everyday.
Exterior Wash and Wax
After addressing the interior, shift your focus to the RV’s exterior, where a gentle wash using mild detergent and a soft brush can make a significant difference in its appearance and longevity. Start from the top and work your way down, making sure you’re not overlooking any spots. This process isn’t just about aesthetics; it’s about preserving your home on wheels.
Use a mild detergent that won’t strip away protective coatings and opt for a soft brush that can reach into those tricky nooks and crannies without scratching the surface. Pay special attention to cleaning the wheels and undercarriage, as these areas are prone to collecting road grime and salt that can lead to corrosion. Don’t neglect awnings and slide-outs—these features require thorough cleaning to prevent dirt buildup and potential damage.
Once you’ve covered every inch, it’s time for thoroughly rinsing. Make sure no soap residue remains, as it can attract dirt and degrade the RV’s surface over time. Finally, applying a coat of wax not only leaves the exterior looking shiny and new but also adds a layer of UV protection, safeguarding your freedom on the road against the elements.
Appliance and System Check
After giving your RV’s exterior a thorough wash and wax, it’s important to turn your attention to the appliances and systems inside. You’ll want to test and sanitize your water system, check for gas leaks, and make sure all electrical components are functioning correctly. This proactive approach not only maintains your RV’s safety and efficiency but also heads off potential problems down the road.
System Maintenance Overview
Once you’ve addressed the interior and exterior cleaning of your RV, it’s crucial to shift your focus to system maintenance, making sure all appliances and systems are in excellent condition before your next journey. By keeping everything clean and ready, you’ll prevent water damage and guarantee a seamless adventure.
- Test water systems and flush tanks to examine for leaks.
- Sanitize the water system and replace filters for fresh drinking water.
- Check propane systems, ovens, stoves, and heaters for leaks or issues.
- Test the electrical system, including lights, outlets, and switches, for peak function.
- Conduct a thorough inspection of all appliances and systems to pinpoint any maintenance needs.
Mold and Pest Solutions
To safeguard your RV from the dual threats of mold and pests, it’s crucial to address damp areas and uphold cleanliness rigorously. Mold and mildew thrive in the bathroom and kitchen, places where moisture lingers. To fend off these unwelcome guests, utilize specialized mold removal products tailored for RVs. They’re your best option in eradicating mold and preventing its recurrence. Don’t neglect water leaks; they’re the source of mold infestations. Inspect your RV regularly, and repair any leaks promptly to keep your living space dry and mold-free.
Pest infestations, conversely, can transform your freedom on wheels into a nightmare. Mice and insects aren’t just a bother; they can cause significant damage to your RV’s components. The key to keeping them at bay? Cleanliness. Routine deep cleaning removes potential food sources that attract pests. Be comprehensive in your approach, and don’t provide pests a reason to inhabit your RV. By staying watchful and maintaining a clean environment, you’ll guarantee your RV remains a sanctuary of freedom and adventure, not a refuge for mold and pests.
Improving Air Quality
Why not start enhancing your RV’s air quality today by regularly changing its air filters, a simple yet effective step in reducing dust and allergens? Clean or replace these essential components as part of your regular maintenance routine to make certain the air you breathe is as fresh as the open road ahead. Improving air quality isn’t just about comfort; it’s about maintaining a healthier lifestyle while you explore.
To effectively enhance air quality, consider these practical steps:
- Replace AC air filters every 90 days to keep the system running efficiently and the air clean.
- Utilize air purifiers designed for RVs to address pollutants that filters alone can’t.
- Follow the manufacturer’s maintenance instructions carefully to avoid inadvertently compromising air quality.
- Ventilate your RV regularly to allow fresh air to circulate and dilute any indoor pollutants.
- Address mold and pest issues promptly, as these can have a significant impact on air quality.
Adhering to these guidelines ensures that your adventures are not just about freedom and exploration, but also about enjoying a safe and healthy living environment on wheels. Regular maintenance and attention to air quality can transform your RV into a haven of freshness, wherever the road may lead.
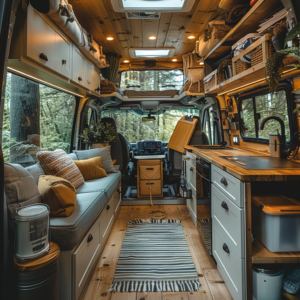
Organizational Tips
After focusing on improving your RV’s air quality, it’s equally important to tackle organizational challenges to make sure your living space is both comfortable and efficient. Start with your kitchen and bathroom, areas prone to clutter and chaos. Use clear storage bins to keep essentials in view and easily accessible. This simple step can prevent the hassle of digging through cabinets, reducing the chance of mold or mildew buildup in hidden corners.
Label your storage compartments, a pro move that guarantees everything has its place, making packing and unpacking a breeze. This strategy is especially useful in the kitchen and bathroom, where items tend to accumulate quickly.
Consider multi-functional furniture with built-in storage to maximize your space. These pieces are invaluable for keeping your living area neat without sacrificing comfort. Plus, they can add a touch of style to your RV.
Adopt the ‘one in, one out’ rule to combat clutter. Before bringing in a new item, make sure an old one leaves. This practice keeps your space manageable and your belongings curated to what’s truly necessary.
Lastly, consult a professional RV organizer if you’re struggling. They can offer tailored solutions that make the most of your unique space, ensuring your home on wheels is always ready for adventure.