
If you own an RV, then you know how important it is to keep it in good shape. A leaking roof can be a serious problem for any motorhome owner, and if left unaddressed, it can cause extensive damage that will cost thousands of dollars to repair.
Fortunately, repairing a leaking RV roof is not as difficult as you might think. In this article, we’ll take you through the steps necessary to diagnose and fix your leaky RV roof. We’ll cover everything from identifying the source of the leak to selecting the right materials and tools for the job.
Whether you’re an experienced DIYer or have never attempted a home repair project before, our guide will give you all the information you need to get your RV back on the road with a watertight seal. So let’s dive into how to repair a leaking RV roof!
Identifying The Source Of The Leak
Your beloved RV is more than just a vehicle. It’s your home away from home, the place where you make unforgettable memories with family and friends. But when water starts dripping from the ceiling, it can feel like a dark cloud has descended upon your happy travels. Don’t let a leaky roof ruin your adventure!
The first step in repairing a leaking RV roof is identifying the source of the problem. Common causes include cracks in the roof sealant, missing or damaged vent covers, and holes in the rubber roofing material. Early detection is key to preventing further damage to the interior of your RV. Check for signs of leakage after every rainstorm or whenever you wash your rig.
To pinpoint the exact location of the leak, thoroughly inspect all areas of your RV’s roof, including around air conditioning units, antennas, skylights, and seams. Look for discoloration or soft spots on the ceiling inside as well as any visible gaps or tears on top.
With patience and attention to detail, you can discover where that pesky drip is coming from and take action to fix it before things get worse.
Now that you know where the leak is coming from, it’s time to prepare your RV for repair by gathering the necessary materials and tools.
Preparing Your RV For Repair
Firstly, you’ll want to clean the roof of your RV. Be sure to use a non-abrasive cleaner and a soft brush to avoid any damage.
Secondly, you’ll need to gather the supplies you’ll need for the repair, such as sealant, caulking, and a tarp.
Thirdly, it’s a good idea to use an RV repair kit to make sure you have all the necessary materials.
Lastly, you’ll want to be sure to wear protective clothing and eyewear when working on the roof to avoid any potential harm.
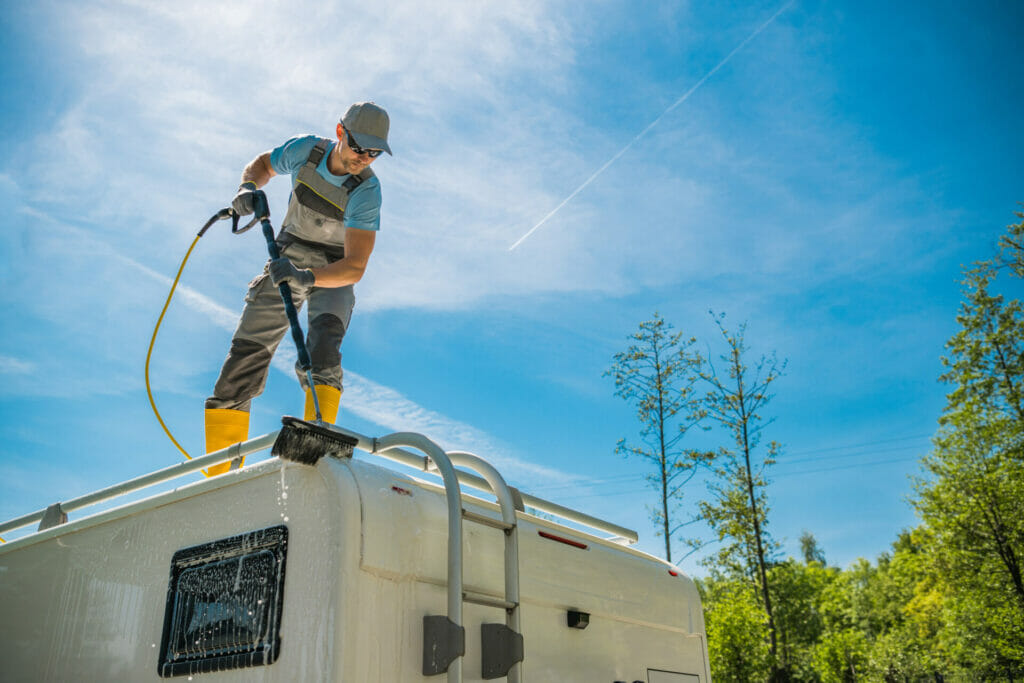
Cleaning The Roof
Picture this: You’re standing on top of your RV, and you can see debris scattered all over the roof.
Before repairing a leaking RV roof, it’s crucial to clean it thoroughly. Start by removing any dirt, leaves, or branches that have accumulated on the surface. Using a broom or leaf blower is an excellent way to get rid of large debris.
Once you’ve removed larger items from the roof, use proper cleaning solutions to eliminate grime and stains. Dishwashing soap mixed with warm water works well for most roofs. However, if your RV has a rubber or TPO roof, avoid using harsh chemicals such as bleach or petroleum-based products that can cause damage. A gentle cleaner specific to these materials should be used instead.
Cleaning the roof may seem like a tedious task before starting an RV repair project but is essential in ensuring long-term success in preventing further leaks down the road. By taking time now to remove debris and properly clean your RV’s rooftop, you’ll provide yourself with peace of mind knowing that moisture won’t continue seeping through cracks and damaging other parts of your vehicle.
Gather Supplies
Now that you have cleaned your RV’s roof, it’s time to gather the essential supplies needed for your repair project. Knowing where to buy these items can save you both time and money.
Firstly, make sure to purchase quality sealant specifically designed for RV use. This will ensure a long-lasting fix without causing any further damage to your vehicle. You can find this at most camping or outdoor stores or online retailers.
Next, consider purchasing replacement parts such as vents or skylights if necessary. Again, check with camping or RV supply stores for options specific to your model of RV.
Finally, don’t forget about safety equipment like gloves and eye protection when using tools during repairs. These items may already be in your toolbox but if not they are readily available at home improvement stores.
Gathering all the necessary supplies before starting an RV repair project is crucial to its success. By knowing where to buy quality sealants and replacement parts and taking proper safety precautions while working on the repairs, you’ll help ensure a smooth process from start to finish.
Choosing The Right Materials And Tools
When it comes to repairing a leaking RV roof, choosing the right materials and tools is essential.
There are various roofing options available in the market that you can choose from. However, before purchasing any material, make sure to consider factors such as durability, ease of installation, and compatibility with your existing roof.
Some popular roofing options for RVs include liquid rubber coatings, TPO (Thermoplastic Olefin) membranes, and EPDM (Ethylene Propylene Diene Monomer). Each has its own advantages and disadvantages, so do your research before making a decision.
Additionally, don’t forget to gather all the essential tools needed for the repair process. Essential tools for fixing a leaky RV roof may include a caulking gun, utility knife or scissors, putty knife or scraper tool, drill with screwdriver bits, measuring tape or ruler, ladder or step stool depending on the height of your vehicle.
Having these tools readily available will not only save you time but also prevent unnecessary frustration during the repair process.
Moving forward into our next section about steps to fix your leaky RV roof – once you have chosen your preferred roofing option and gathered all necessary tools required for the job at hand; it’s now time to proceed with repairing your damaged RV roof.
Steps To Fix Your Leaky RV Roof
As you begin to tackle the task of repairing your leaky RV roof, it’s important to start with a thorough inspection. This will help you identify any problem areas and determine the best course of action for waterproofing.
Grab a ladder and climb up onto your RV’s roof, taking note of any cracks or gaps in the roofing material.
Once you’ve identified the source(s) of the leak, it’s time to move on to waterproofing techniques. There are a variety of products available for this purpose, from sealants and coatings to tapes and patches. Be sure to choose a product that is appropriate for your specific type of roof material, as different materials require different types of waterproofing solutions.
With proper maintenance and upkeep, your RV roof can last for years without leaking or needing repairs. Regularly inspecting your roof for damage, cleaning off debris, and applying protective coatings as needed can go a long way toward ensuring its longevity.
So take care of your investment by staying on top of necessary maintenance tasks!
Maintaining Your RV Roof For Longevity
Regular inspections and professional maintenance are key to ensuring the longevity of your RV roof. By staying on top of any potential issues, you can catch small problems before they turn into large ones.
Inspect your roof at least twice a year, especially after harsh weather conditions or long periods of storage. In addition to regular inspections, protective coatings and waterproof sealants can help extend the life of your RV roof.
These products not only provide an extra layer of protection against leaks and damage but also offer UV protection from the sun’s harmful rays. Make sure to use high-quality products designed specifically for RV roofs and follow all manufacturer instructions.
Remember that prevention is always better than cure when it comes to maintaining your RV roof. Taking proactive steps such as regular inspections and applying protective coatings can save you time, money, and headaches in the long run.
With proper care and attention, your RV roof will continue to protect you through many adventures to come.
Conclusion
In conclusion, repairing a leaking RV roof can be an intimidating task for any owner.
However, by following the steps outlined in this article, you can save yourself from costly repairs down the road and ensure your RV stays dry during your travels.
It’s important to note that prevention is key when it comes to maintaining your RV roof.
Regular inspections and maintenance can catch potential issues before they become major problems.
Don’t fall victim to common misconceptions about RV roofs such as believing they don’t need regular upkeep or that all leaks are caused by damaged seals.
Investigate the truth of these theories to add depth and knowledge to your repair process.
With proper care and attention, your RV roof will continue to serve you well for years to come.